

Tested by Sandra & Jan
From our kitchen in Cyprus
Total Time
210 min
Servings
3
Course
Main Course, Dinner
The Pizza Quest That Changed Everything
I'll never forget standing in that tiny pizzeria in Naples, watching the pizzaiolo's hands move like a conductor's—stretching, spinning, tossing the dough with such confidence that it seemed to float in the air. It was my third day in the city, and I'd already eaten more pizza than I care to admit. But this place, tucked down a narrow alley near Piazza del Gesù Nuovo, was different. The owner, a seventy-something woman named Nonna Maria, noticed me staring through the window and waved me inside.
What happened next transformed how I think about pizza forever. She didn't just let me watch—she put me to work. For the next three hours, flour dusted my hair, water splashed my apron, and my hands learned the language of dough. "Feel it," she kept saying in Italian, pressing my fingers into the silky surface. "The dough tells you everything." She taught me that pizza isn't about fancy equipment or secret ingredients—it's about understanding the simple dance between flour, water, yeast, and salt. And yes, despite what many think, authentic Italian pizza dough is naturally vegan!
Why You'll Love This Recipe
This is the exact method Nonna Maria taught me, adapted for home kitchens and guaranteed to work even if you've never made pizza dough before. What makes this recipe special is the timing—just 3 hours from start to dinner, perfect for those evenings when you suddenly crave homemade pizza. Unlike overnight doughs that require planning, this quick version delivers incredible flavor and texture without the wait.
The secret lies in the precise ratios and technique. You'll create a dough that's stretchy enough to see light through when you hold it up, yet strong enough not to tear. The crust bakes up with those perfect leopard spots on the bottom and air pockets that make each bite light and airy. Plus, making your own dough means you control exactly what goes into it—no additives, no preservatives, just pure, wholesome ingredients.
The Science Behind Perfect Dough
Here's what Nonna Maria taught me about why each ingredient matters: The protein content in flour is your foundation. Higher protein (around 12%) means more gluten development, which gives you that characteristic chewiness and stretch. I use either Italian tipo 00 flour or good-quality all-purpose flour—both work beautifully. The water hydrates the flour and activates the gluten network, while yeast creates those flavor-developing fermentation bubbles. Salt isn't just for taste; it actually strengthens the gluten and controls yeast activity, preventing over-fermentation.
The most critical lesson? Never let salt touch yeast directly—it kills the little organisms through osmosis. That's why we create a "protection layer" of flour first. This one trick alone will transform your pizza-making success rate.
Pro Tips for Foolproof Results
Temperature is everything. Your final dough should be between 23-25°C (73-77°F). If your kitchen is warm, use colder water; if it's cool, slightly warmer water. This ensures consistent fermentation regardless of season.
The pinch test is your best friend. After kneading, press your fingertip about 1-2 cm into the dough. If it springs right back immediately, your gluten network is perfect. If it stays indented, let it rest another 5-10 minutes and knead briefly again.
Don't skip the resting period after the first knead. Those 15 minutes let the flour fully absorb the water, transforming a shaggy mess into silky smooth dough. I learned this the hard way in Naples—Nonna Maria literally took the dough away from me when I tried to rush it!
Variations & Serving Suggestions
Once you master this basic dough, the world opens up. Add dried herbs like oregano or basil directly to the flour for an aromatic crust. Mix in a tablespoon of olive oil for a slightly richer, more tender texture (though traditional Neapolitan style omits it). For a whole grain version, replace up to 30% of the flour with whole wheat—any more and you'll need to adjust the water content.
I love using this dough for classic Margherita (tomato sauce, vegan mozzarella, fresh basil), but it's equally fantastic for white pizzas with garlic, rosemary, and olive oil, or loaded veggie pizzas with roasted peppers, mushrooms, and artichokes. The dough also makes incredible focaccia if you skip the stretching and just dimple it in an oiled pan.
Storage & Make-Ahead Magic
While this is designed as a quick dough, you can absolutely make it ahead. After the first rise, portion into balls, coat lightly with olive oil, and refrigerate in airtight containers for up to 3 days. Just bring to room temperature for 30 minutes before stretching. You can even freeze the dough balls for up to 3 months—thaw overnight in the refrigerator, then bring to room temperature.
Leftover baked pizza keeps in the refrigerator for 3-4 days and reheats beautifully in a hot skillet (much better than microwave!). Trust me on this—a few minutes in a covered pan over medium heat brings back that crispy bottom and melty top perfectly.

Authentic Italian-Style Vegan Pizza Dough (3-Hour Quick Recipe)
Master this foolproof 3-hour vegan pizza dough with simple ingredients. Learn the exact technique Italian pizzaiolos use for perfectly stretchy dough.
👩🍳Instructions
Pour the cold water into a large mixing bowl. This is your foundation, so use a bowl big enough to give you plenty of working room.
Dissolve the salt completely in the water, stirring until you can't see any crystals remaining. This is important for even distribution throughout your dough.
Add about one-third of the flour (roughly 165g) to the salty water. Mix with your hand or a wooden spoon until you get a smooth, creamy consistency—like a thick pancake batter. This creates the protective layer for your yeast.
Crumble the fresh yeast (or sprinkle the dry yeast) directly into this creamy mixture. Gently stir it in. The flour layer protects the yeast from the salt's harsh effects—this step is crucial for proper fermentation!
Begin adding the remaining flour gradually, mixing by hand. Add it in increments, incorporating each addition before adding more. You'll eventually have a rough, sticky dough that pulls away from the bowl's sides but still clings to your fingers.
Turn the dough out onto a clean, lightly floured work surface. Knead for about 5 minutes using the push-fold-turn technique: push the dough away with the heel of your hand, fold it back over itself, give it a quarter turn, and repeat. The dough will transform from sticky and shaggy to smooth and cohesive. It should stop sticking to your hands and the counter.
Cover the dough with a damp kitchen towel or the upturned bowl and let it rest for 15 minutes. During this time, the flour fully absorbs the water—you'll be amazed at the transformation. Use this time to clean your work surface and hands.
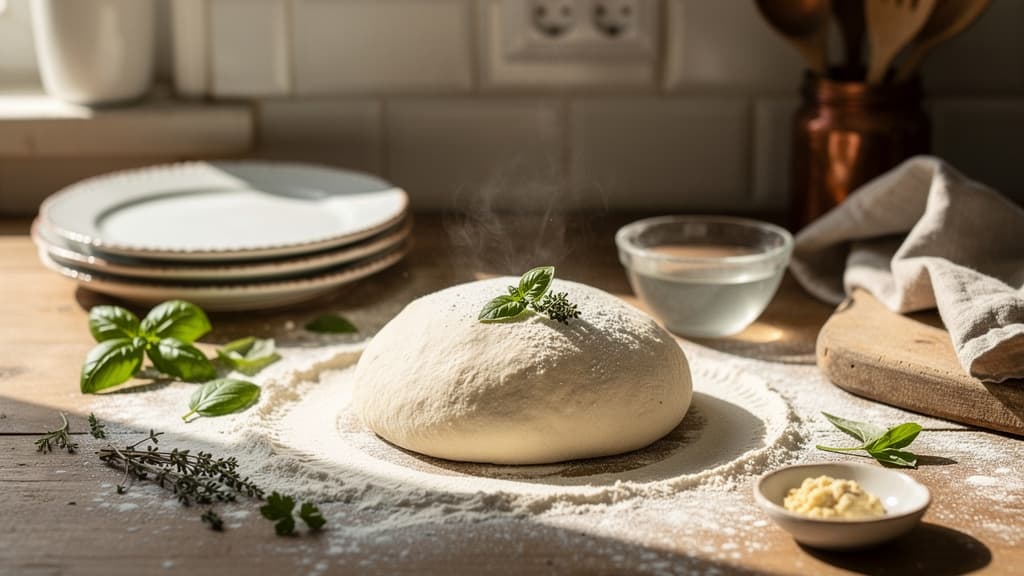
Uncover the dough and knead for just 1-2 more minutes. Notice how much smoother and more elastic it feels now? Shape it into a beautiful round ball with a taut, silky surface. Perform the pinch test: press your fingertip about 1-2 cm deep into the dough. If it springs right back immediately, you're done! If not, cover and rest another 5-10 minutes, then knead briefly again.
Lightly oil your mixing bowl with olive oil. Place the dough ball inside, turning it to coat all sides with oil. This prevents a dry skin from forming. Cover tightly with plastic wrap or a damp towel.
Place the bowl in a warm spot (around 20°C/68°F) away from drafts. Let the dough rise for 1 hour. It should roughly double in size and feel puffy when gently pressed.
After the first hour, gently punch down the dough to release the gas. Divide it into 3 equal portions (about 275g each). Shape each portion into a smooth ball by tucking the edges underneath and rolling between your palms.
Place the dough balls on a lightly floured surface or tray, spacing them apart. Cover with a damp towel and let them rest for another 1.5-2 hours until puffy and relaxed. They should feel soft and airy when gently poked.
About 30-45 minutes before you're ready to make pizza, preheat your oven to its highest temperature (usually 250-280°C/480-535°F). If you have a pizza stone or steel, place it in the oven now to heat up.
When ready to shape, work with one dough ball at a time, keeping the others covered. Gently press the ball into a disk with your fingertips, leaving a slightly thicker edge for the crust. Then, using your hands, gently stretch the dough outward from the center, rotating as you go. You can also drape it over your knuckles and let gravity help stretch it. Aim for about 25-30 cm (10-12 inches) in diameter. You should be able to see light through the dough when you hold it up—that's when you know it's perfect!
Top your pizza as desired (less is more in true Italian style!), and bake for 8-12 minutes until the crust is golden with those beautiful charred spots and the toppings are bubbling. Let it cool for just a minute before slicing—I know it's hard to wait, but it's worth it!
Nutrition Facts
Per serving: 1/3 of recipe
Love this recipe?
Share it with friends or save it for later